


Selecting the correct DIY Assembly Tools determines whether your modular barn lasts decades or rusts within seasons. While standard power drills suffice for softwood, they inevitably fail against the 14-gauge Q345B High Strength Steel used in professional equestrian engineering. Attempting to drive fasteners with underpowered equipment risks stripping the 304 stainless steel hardware and compromising the entire structural framework before the first horse enters the stall.
This guide outlines the specific instrumentation required to install DB Stable hot-dip galvanized panels without damaging the protective zinc coating. We detail the torque specifications for our ISO 1461 compliant system and explain why a high-torque impact driver paired with 6-point sockets is the only way to secure the cast-proof design effectively.


The Myth of Needing a Professional Welder for Barns
Modern equestrian engineering replaces destructive on-site welding with factory-galvanized panels and high-strength bolted connections, eliminating expensive labor while preserving corrosion resistance.
The Hidden Costs and Corrosion Risks of Field Welding
There is a lingering assumption in facility construction that “welded on-site” equals “stronger.” In the context of equine infrastructure, this is often false. Field welding is actually the fastest way to compromise the longevity of a steel barn.
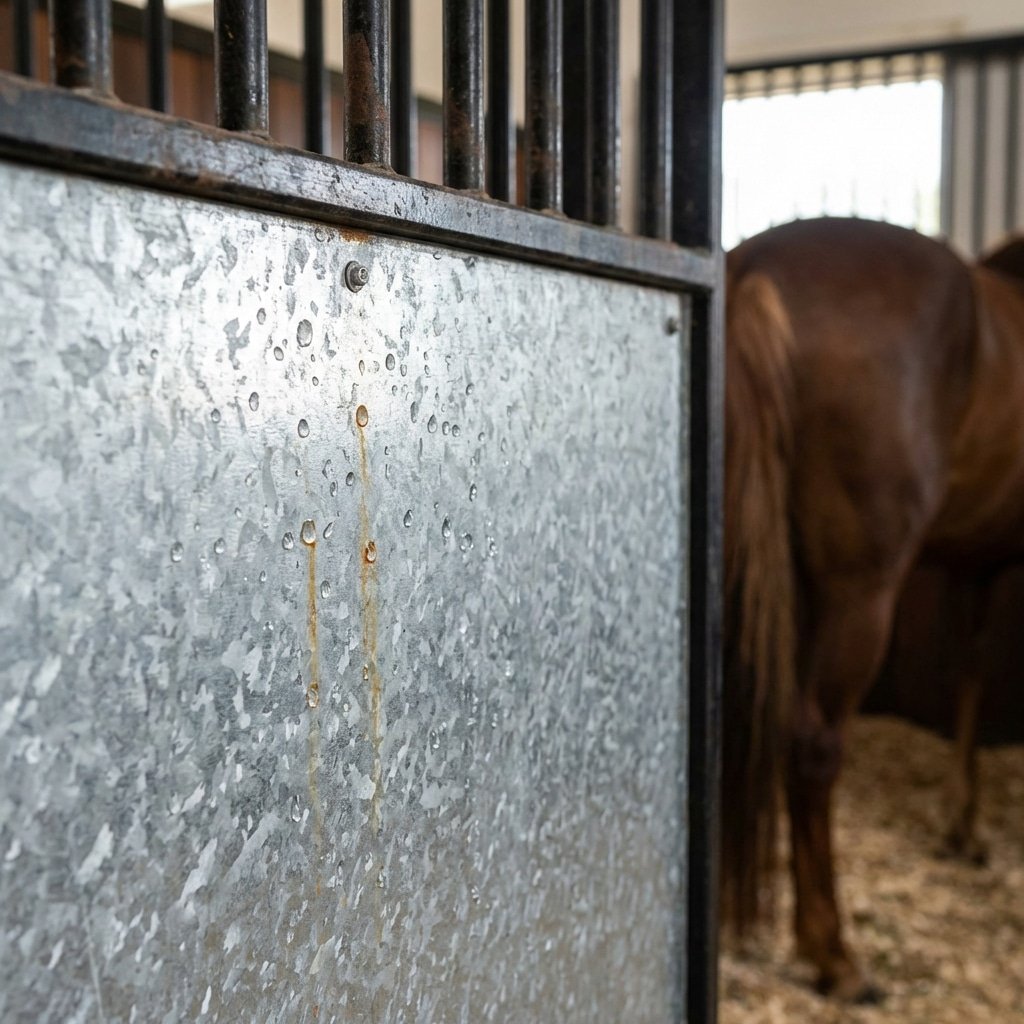
The problem is chemical. Welding generates extreme heat that burns off the hot-dip galvanized coating instantly. This leaves the steel joint exposed to the atmosphere, creating an immediate rust point before the barn is even finished. Most contractors attempt to fix this by painting over the weld with cold zinc spray. But let’s be clear: a spray can never match the metallurgical bond and durability of the original ISO 1461 zinc bath.
Beyond the corrosion issue, the economics make little sense. Hiring certified professional welders adds a massive premium to your installation budget. You are paying for a specialized skill that simply isn’t necessary for modern modular assembly.
Structural Strength Without the Spark: The Bolt-Together System
We engineered the DB Stable system to bypass these issues entirely. Our approach separates the structural welding from the installation process. We utilize a flat-pack system where all Q235B (Standard) or Q345B (Cold Climate) steel frames are factory-welded first. Only after fabrication do we submerge them for hot-dip galvanization, ensuring the zinc covers every inch of the weld.
- 304 Stainless Steel Hardware: Assembly relies on a standardized kit that resists rust as effectively as the frame itself.
- Engineered Rigidity: The bolt-together design provides calculated structural consistency that often exceeds the quality of variable on-site welds.
- Profit Protection: By using general labor for assembly rather than specialized trades, you protect your margins and speed up the project timeline.


The Essential Tool Kit: Impact Driver, Socket Set, Laser Level
Assembling 14-gauge Q345B steel frames requires high-torque impact drivers and 6-point sockets for 304 stainless hardware. Laser precision is non-negotiable for functional sliding door tracks.
| Tool Category | Required Spec | Assembly Application |
|---|---|---|
| Impact Driver | High-Torque (Brushless), 18V+ | Driving fasteners into Q345B High Strength Steel columns. |
| Socket Set | Impact-Rated, 6-Point Design | Securing 304 Stainless Steel anchor bolts without stripping. |
| Laser Level | 360-degree Self-Leveling | Aligning hidden door tracks and ventilation grills. |
Impact Drivers and Sockets for Structural Assembly
Standard power drills often fail when dealing with our heavy-duty specifications. DB Stable manufactures frames using Q345B Low Alloy High Strength Steel (equivalent to ASTM Grade 50), which is significantly harder than the standard Q235B mild steel used by budget competitors. To drive self-tapping screws or secure frame connections into this 14-gauge (2.0mm – 2.5mm) material, you need the rotational force of a professional impact driver. This ensures the fasteners seat fully without snapping the heads or burning out the tool motor.
The hardware kit included with every stable consists exclusively of 304 Stainless Steel to match our “Lifetime” rust protection standards. Stainless steel is softer than hardened tool steel, making it prone to rounding off if you use cheap 12-point sockets. We mandate the use of impact-rated, 6-point sockets. These grip the flat sides of the fastener rather than the corners, delivering the necessary torque to the anchor bolts without compromising the hardware integrity.
Laser Levels for Precise Panel Alignment
Spirit levels are insufficient for installing a long row of modular stables. A minor deviation of 2mm at the first stall can compound into a 20mm error by the tenth stall, causing major structural misalignment. A 360-degree laser level provides a constant reference line across the entire concrete slab, which is critical for the functionality of our أبواب منزلقة. The DB Stable “Hidden Track System” relies on perfectly parallel top and bottom guides. If the bottom channel dips or rises due to uneven installation, the sealed bearing rollers will bind, destroying the smooth operation we promise.
- Vertical Accuracy: Ensures the “Stack Effect” ventilation grills align visually across all stall fronts for a professional finish.
- Track Functionality: Prevents friction in the sliding door mechanism caused by twisted frames.
- Infill Expansion: Guarantees the U-channels are square, allowing HDPE or Bamboo planks to expand and contract naturally without buckling.
Premium Stables Built to Last 20 Years
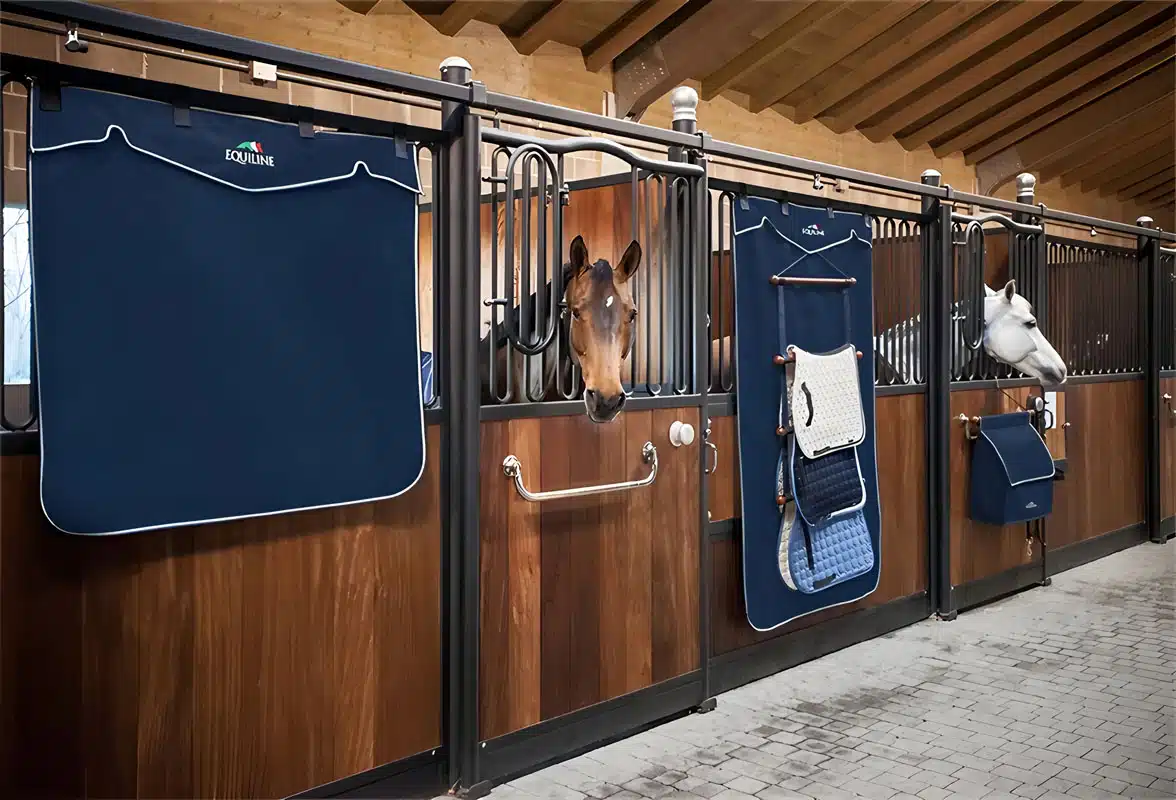
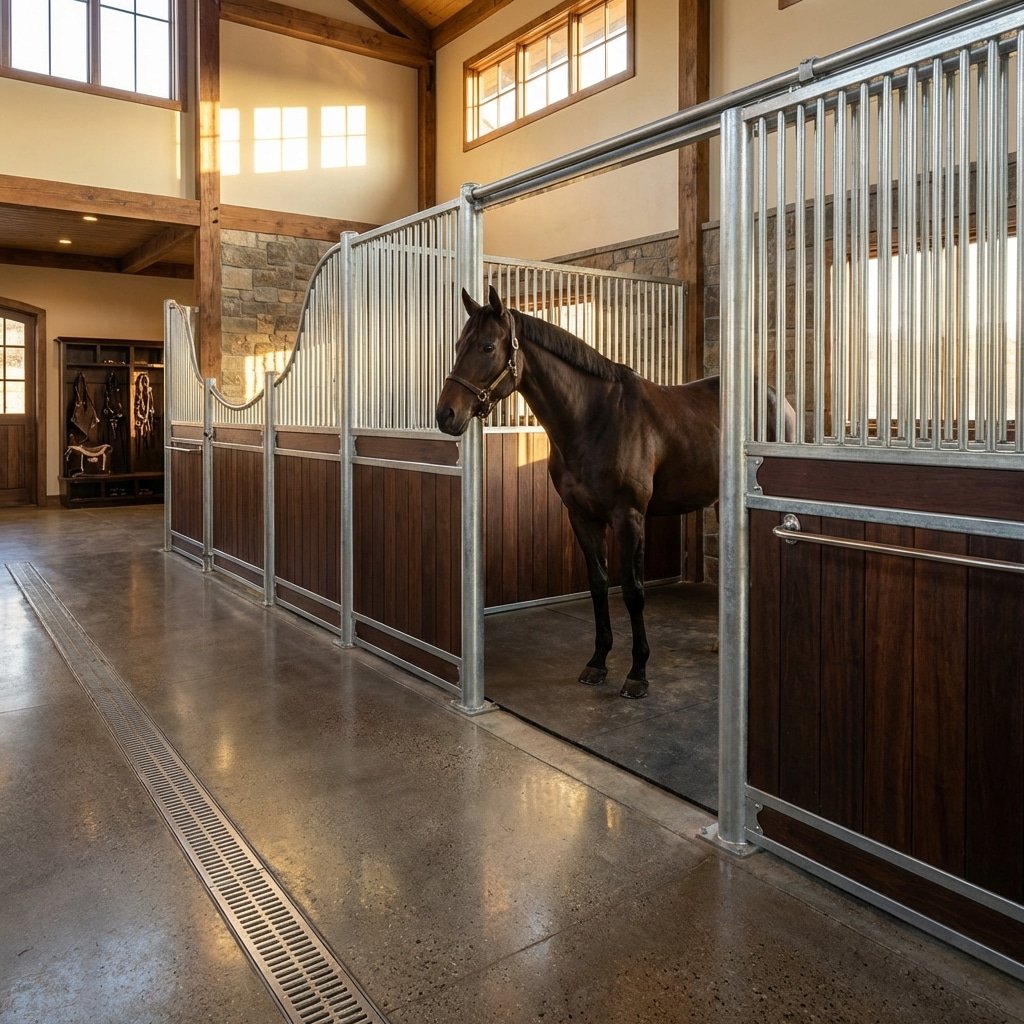
Bolting the U-Channel Horse Stall Panels Together
Secure panels using exterior-facing carriage bolts and interior sleeve nuts. We supply a full 304 Stainless Steel hardware kit to ensure connections last as long as the galvanized frames.
The Exterior-Facing Carriage Bolt Technique
Safety dictates the assembly direction here. You must position all potentially sharp bolt ends away from the animal to prevent injury during rubbing or cribbing. We engineer our system to rely on a specific orientation of the fasteners.
- Exterior Insertion: Insert carriage bolts from the outside of the stall front or partition.
- Interior Safety: Fasten the assembly using rounded sleeve nuts on the interior, creating a smooth surface that won’t cut the horse’s skin.
- Alignment: Align the vertical U-channel flanges precisely before inserting bolts to avoid stripping the threads during the initial torque phase.
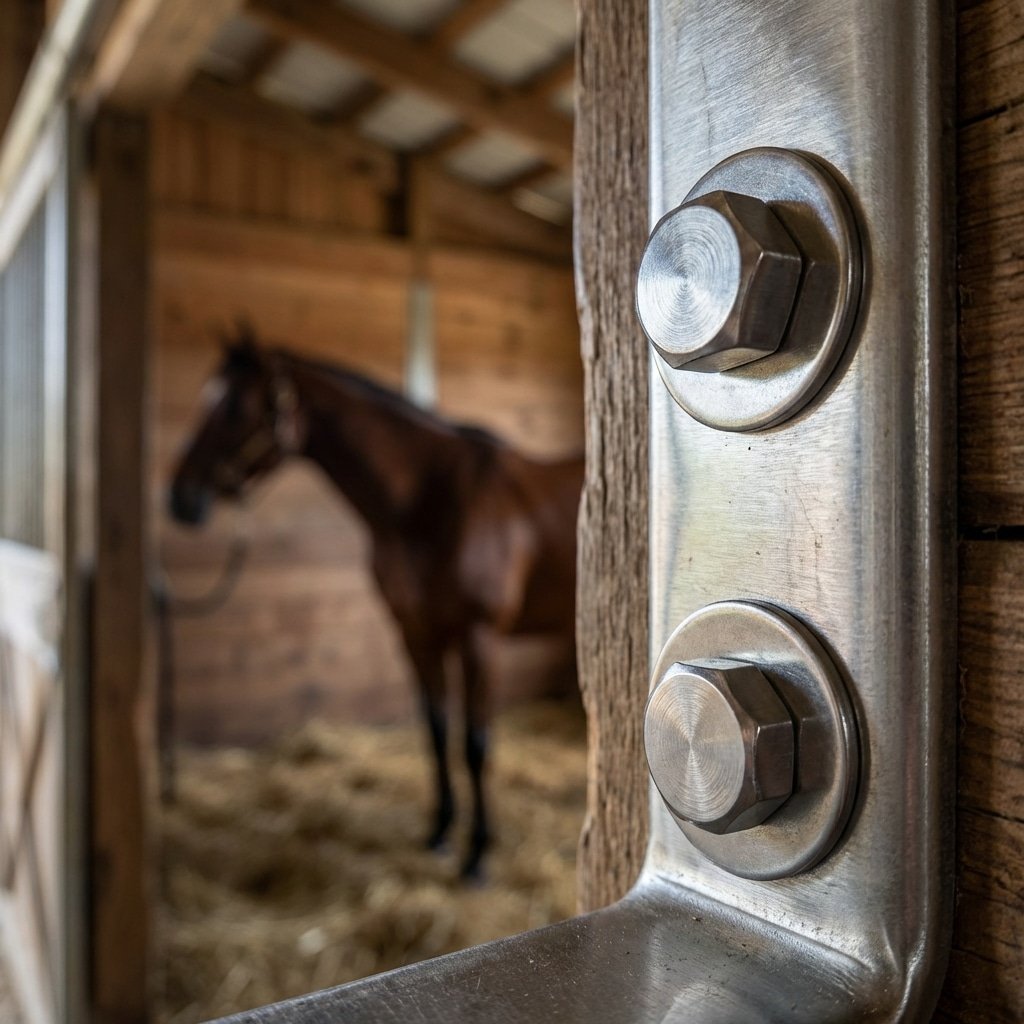
The Advantage of 304 Stainless Steel Hardware
Most competitors cut costs by including standard zinc-plated fasteners. These cheap bolts rust rapidly when exposed to the high ammonia levels found in active stables. At DB Stable, we refuse to compromise the assembly’s integrity. We include a complete 304 Stainless Steel hardware kit with every flat-pack delivery.
- Material Standard: We use only 304 Grade Stainless Steel (18-8) for all connectors, anchors, and screws.
- Chemical Resistance: 304 stainless resists the corrosive effects of urine and moisture far better than galvanized or zinc-plated alternatives.
- Structural Match: This ensures the connection points last just as long as our hot-dip galvanized frames without becoming the weak link in the structure.

Torquing 304 Stainless Steel Bolts to Spec
Quick Spec: Torque 3/8″ bolts to 236 in-lbs and 1/2″ bolts to 43 ft-lbs. Reduce by 20% if using lubricant to prevent thread failure.
Preventing Thread Galling (Cold Welding)
304 Stainless Steel offers excellent corrosion resistance for stable environments, but it behaves differently than standard carbon steel during assembly. This material is ductile, making it highly susceptible to thread galling—a process where friction generates enough heat to seize and cold-weld the threads together permanently. Once this happens, the only solution is cutting the bolt off.
Most installation failures occur because crews use high-speed impact drivers for final tightening. The rapid rotation spikes the temperature instantly, triggering the seizure. To avoid this costly downtime, ensure threads are clean of grit and debris before assembly. Hand-tightening or low-speed setting is mandatory before applying final torque.
Torque Standards for Dry and Lubricated Hardware
We supply 304 Stainless Steel hardware with our installation kits to ensure longevity. Precise torque application is critical to maintaining clamp load without stripping the threads. The values below represent the standard targets for our specific bolt sizes.
| Bolt Size (UNC) | Dry Torque Target | Lubricated Torque Target (-20%) |
|---|---|---|
| 3/8″-16 | 236 in-lbs | ~188 in-lbs |
| 1/2″-13 | 43 ft-lbs | ~35 ft-lbs |
If you apply anti-seize or oil to the threads, you must reduce the torque target by approximately 15-20%. Lubricants lower the coefficient of friction, meaning the bolt reaches the same tension with less force. Over-torquing lubricated bolts is a common error that stretches the fastener beyond its yield point.
- Tools: Use a calibrated torque wrench, not an impact gun, for the final turn.
- Pattern: Tighten stall connector plates in a cross-pattern to distribute clamping force evenly.
- التحقق: Double-check the setting against the specific thread pitch (16 TPI for 3/8″ and 13 TPI for 1/2″) before applying force.

Shimming the Panels on Uneven Concrete
Use non-compressible shims under base plates to compensate for concrete dips, ensuring a level top track while preventing structural stress or door binding.
Installing Shims Under Structural Post Bases
Concrete floors are rarely perfect, but your stable frame has to be. Start by identifying the highest point of your concrete slab. This spot is your benchmark—you won’t shim here, but you will bring every other post up to match this level. If you try to force the frame down to follow a dipping floor, you will twist the steel and the doors will fail.
- Material Selection: Use steel or composite high-density shims. Never use wood; it rots quickly in stable environments, leading to loose panels.
- Placement: Position shims directly under the base plates of the 50mm x 50mm RHS or 114mm Round Posts.
- Anchoring: Ensure your 304 stainless steel anchor bolts pass through the shim stack. This locks them in place so vibration from horse kicks cannot dislodge them.
- Large Gaps: If the gap under the plate exceeds 10mm, shims provide insufficient surface area. Use high-strength non-shrink grout or a self-leveling compound to create a solid bearing surface.
Maintaining the 50mm Cast-Proof Clearance
Every DB Stable panel is engineered with a ‘Cast-Proof Design’, featuring a specific bottom gap of approximately 50mm. This clearance is critical safety engineering—it prevents a horse from getting a hoof or leg trapped if they roll against the partition. Shimming introduces a variable that can compromise this safety feature.
When you shim a post on a low spot, you lift the entire panel, increasing the bottom gap. If you shim 25mm to level the frame, your bottom gap becomes 75mm, which may create an entrapment hazard. Monitor this gap constantly as you level the system.
- Gap Mitigation: If shimming pushes the gap beyond safe limits, you must either grind down the high points of the concrete or add a custom filler strip to the bottom of the panel.
- Door Functionality: Prioritize a level top rail above all else. Distinct changes in elevation or a twisted frame will cause the sliding door track to bind, leading to derailments and premature bearing failure.
الأسئلة المتداولة
هل أحتاج إلى عامل لحام معتمد لتركيب هذه الأكشاك؟
No. The DB Stable system is a completely bolt-together assembly. We manufacture pre-drilled Q235B steel frames that connect using 304 stainless steel hardware. This eliminates the need for on-site welding, which protects the integrity of the hot-dip galvanized coating (BS EN ISO 1461). Welding on site burns off this zinc layer and creates immediate rust points, whereas bolting preserves the finish and significantly lowers your installation costs.
What specific tools do I need for the assembly?
You need a standard set of mechanics’ tools: an impact driver, a metric socket set, a torque wrench, and a laser or spirit level. For securing the posts to the ground, a rotary hammer drill is required to install the concrete anchor bolts properly. We supply the specialized 304 stainless fasteners in the kit; you just need the standard hardware to drive them home.
Is a bolt-together kit as strong as a fully welded barn?
Yes. We strictly use heavy-duty 14-gauge (2.0mm to 2.5mm) steel tubing for all structural components, unlike budget competitors who drop to 1.5mm. When the bolts are torqued to specification, the mechanical connections create a rigid framework that rivals welded structures. A major advantage is maintenance: if a horse kicks through a partition, you can unbolt and replace that single component rather than cutting out and re-welding a damaged section.
How do I install the panels if my concrete floor is not perfectly level?
The system is designed with tolerance for common site imperfections. You can place composite or metal shims under the bottom U-channel or base plates to level the panels before tightening the anchor bolts. The goal is to ensure the top door tracks remain perfectly horizontal. As long as the track is level, the sliding doors will operate smoothly regardless of slight variations in the floor grade.
How long does it typically take to assemble one stall?
Once your concrete footing is cured and the site is prepped, a two-person team can typically assemble a standard 3.5m x 3.5m stall (front and side partition) in about 45 to 60 minutes. Our flat-pack system requires no cutting or fabrication, so the process is purely alignment and fastening.
الأفكار النهائية
Trading expensive field labor for a precise bolt-together assembly protects both your construction budget and the steel’s structural integrity. By eliminating destructive on-site welding, you preserve the ISO 1461 hot-dip galvanized coating that guarantees decades of rust resistance. This method ensures your facility maintains its professional value without the hidden liability of specialized trades.
Efficient construction starts with superior engineering, so verify our system’s quality with a specific project consultation or a trial order. Our team is ready to configure a flat-pack solution that maximizes your container load and minimizes your final assembly time. Request your technical specification sheet today to secure your production slot.


0 تعليق