


Proper Stall Mats Alignment dictates the safety of your entire stable facility. Ignoring the specific thickness of your rubber flooring before drilling anchor bolts destroys the critical Cast-Proof safety zone, creating dangerous pinch points that trap hooves and necessitate expensive retrofitting.
This guide calibrates your installation against the DB 50mm clearance standard to prevent entrapment risks. We analyze how 17mm versus 25mm rubber impacts the bottom rail gap, ensuring your Hot-Dip Galvanized partitions maintain essential drainage and strictly adhere to safety dimensions.

The Anatomy of the DB 50mm Bottom Clearance
The DB 50mm clearance creates a strict “Cast-Proof” safety zone while ensuring essential drainage and ammonia resistance at the critical floor level.
The “Cast-Proof” Safety Dimension
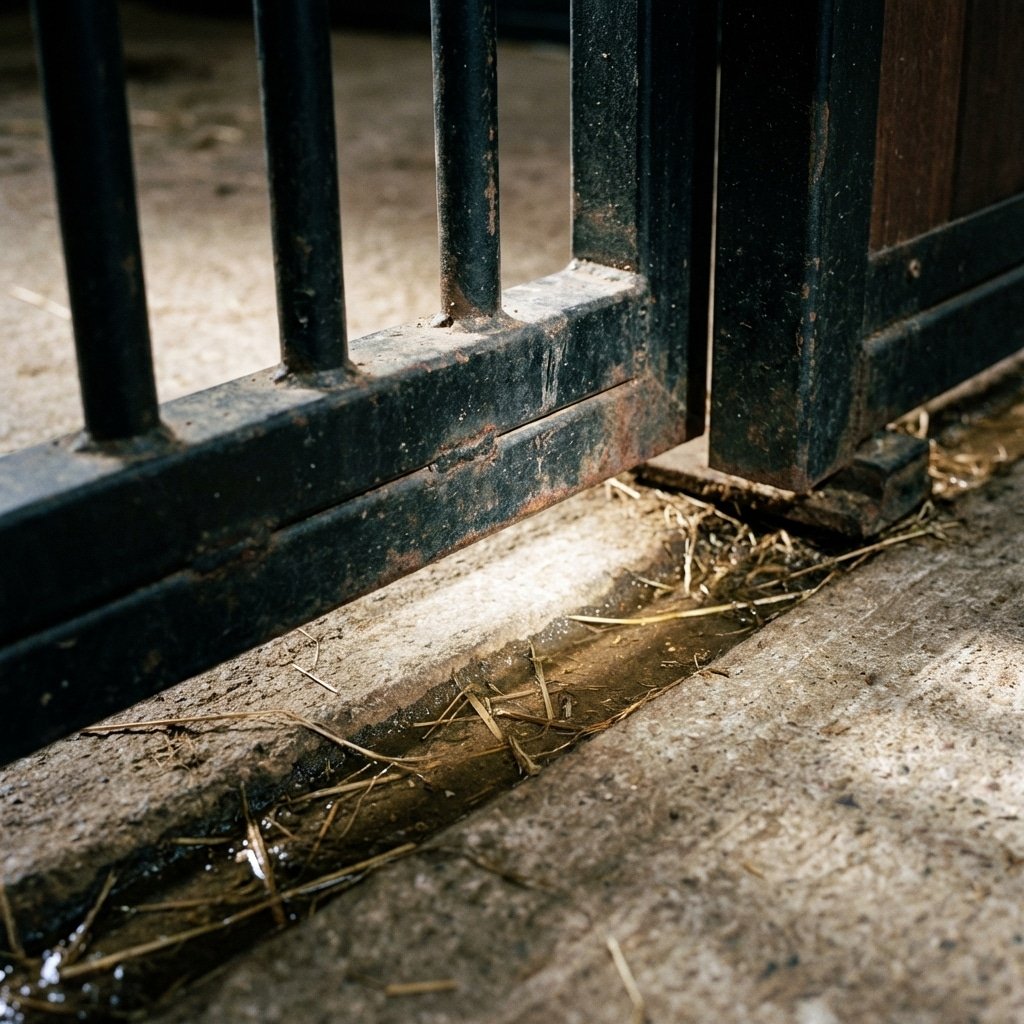
Safety in a stable often comes down to millimeters. We engineer the bottom gap strictly at 50mm to solve a specific, high-risk problem: casting. When a horse rolls in its stall, it can easily trap a leg under a partition if the gap is too wide. A 50mm clearance is narrow enough to deflect a hoof, preventing the leg from sliding underneath and reducing the risk of panic-induced injuries.
This dimension also balances safety with facility hygiene. Sealing the bottom completely traps moisture and ammonia against the steel, accelerating corrosion. The 50mm gap allows liquids to drain freely into the aisle or drainage channels. It also drives “Stack Effect” ventilation, where fresh air enters at the floor level to push warm, stale air up and out through the top grill.
The Hot-Dip Galvanized Bottom Rail
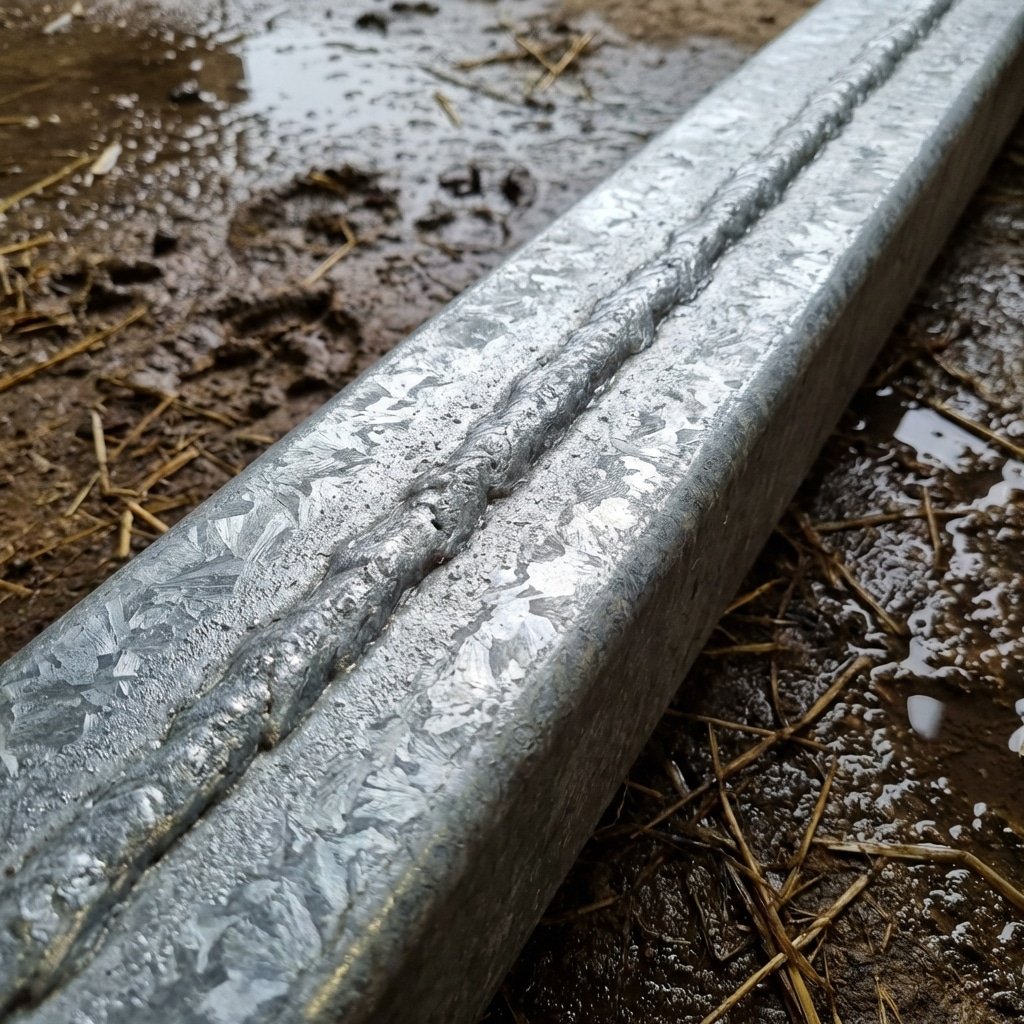
The bottom rail acts as the foundation of the partition, sitting directly in the “kill zone” for steel—the mat line. This area sees the highest concentration of wet bedding, urine, and ammonia. Standard pre-galvanized steel (black tube welded together) creates weak points at the weld seams that rot out within a few years at this level.
We construct this rail using heavy-duty 50x50mm RHS (Square Hollow Section) for structural rigidity. Crucially, we treat it with Hot-Dip Galvanization Después de la fabricación (ISO 1461). We weld the frame first, then submerge the entire unit in molten zinc. This seals every weld and crevice with a zinc coating averaging over 70 microns, providing a metallurgical bond that ammonia cannot penetrate.
Why You Must Measure the Mat Thickness First (17mm vs 25mm)
Measuring mat thickness defines your stable’s vertical safety alignment. Ignoring this leads to door binding and compromised “Cast-Proof” bottom gaps.
Preventing Surface Curling and Misalignment
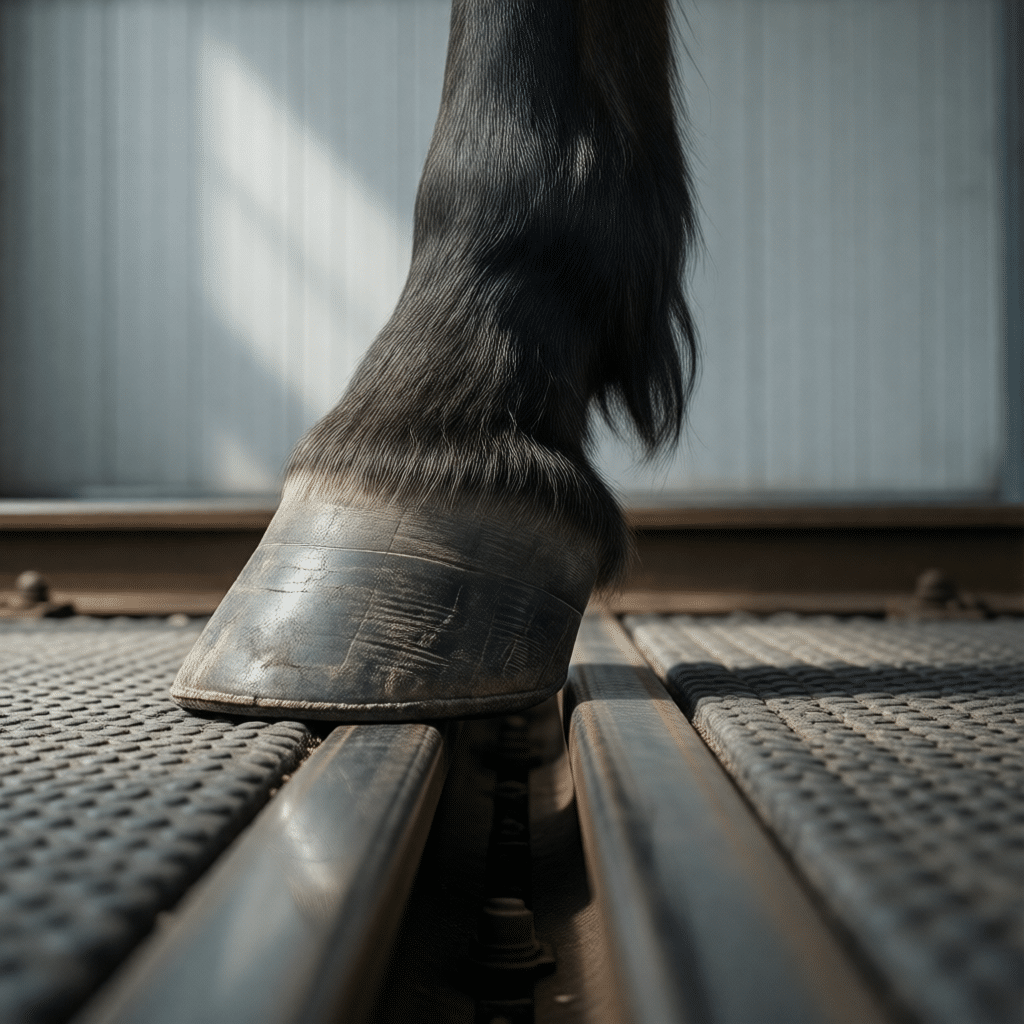
Selecting between 17mm and 25mm rubber mats involves more than just price; it dictates the physical stability of the stall floor. Thinner 17mm mats, while common in lighter-duty applications, lack the structural rigidity to bridge imperfections in the concrete subfloor. They tend to conform to every dip and hollow, creating uneven surfaces where urine pools and bacteria accumulates. Under the weight of a 500kg horse, these mats frequently curl at the corners or buckle at the edges, introducing trip hazards that compromise the safety of the stable environment.
- Subfloor Conformity: 17mm mats mirror subfloor irregularities, causing hazardous dips, whereas 25mm mats offer enough rigidity to bridge minor unevenness.
- Edge Stability: Thinner rubber is prone to corner curling and edge buckling under heavy hoof traffic; 25mm mats remain flat and stable.
- Interlocking Integrity: Precision locks fail when thinner mats stretch or warp over time. Thicker mats maintain their geometric shape, keeping seams tight.
Adjusting for the 50mm “Cast-Proof” Clearance
The specific thickness of your flooring directly impacts the vertical installation of the stable fronts. DB Stable fronts function with a strict 50mm “Cast-Proof” bottom gap. This clearance prevents a horse from getting a leg trapped if they roll near the door. Installing the steel panels before accounting for the mat thickness destroys this safety feature.
If you install panels directly on the concrete and then add 25mm mats, you reduce the safety gap to 25mm. This is insufficient for drainage and creates a pinch point. Conversely, installing panels high to accommodate 25mm mats, but then using 17mm rubber, leaves a gap large enough for a hoof to slide under. You must determine the Finish Floor Level (FFL) before drilling a single anchor bolt.
- Safety Gap Integrity: Installing panels without measuring mats creates unsafe clearances (<25mm) or dangerous entrapment zones (>70mm).
- Door Operation: Sliding doors require a level track relative to the rubber. Unmeasured installation causes doors to drag on the mats.
- Elevation Requirements: Using 25mm mats often requires shimming the steel framework to maintain the standard 50mm gap above the finished rubber surface.
Rust-Resistant Stables Engineered For Extreme Climates
Trimming Rubber Mats to Fit Inside the 12×12 Grid
Skip power saws; they melt rubber and bind blades. The “score and fold” method using a utility knife guarantees clean edges without smoke or jagged cuts.
The Score-and-Fold Cutting Technique
Most installers make the mistake of attacking stall mats with a jigsaw or circular saw. This creates excessive friction, causes the rubber to smoke, and binds the blade, leaving a rough, jagged edge. The professional approach relies on manual leverage rather than electric power. A heavy-duty utility knife allows for precision without the risk of melting the material.
- Use a 2×4 Fulcrum: Slide a standard 2×4 board directly underneath your cut line. This elevates the mat and uses gravity to pull the seam open as you cut, significantly reducing drag on the blade.
- Score, Don’t Slice: Do not attempt to cut through the entire thickness in one pass. Make 2-3 shallow scoring passes to define the line.
- The Fold Method: Once scored, bend the mat back over the 2×4 to snap the rubber along the line, then finish with a final light cut to separate the pieces.
- Blade Management: Rubber dulls steel quickly. Swap blades every 2-3 cuts to maintain a clean edge and reduce physical exertion.
Managing Wall Allowances and Seams
Mat positioning dictates the longevity of the stall floor. Factory-cut interlocking edges offer the tightest possible seal and must remain in the center of the stall where hoof traffic is heaviest. Hand-trimmed edges should always face the outer walls, where minor imperfections affect performance less.
- Protect the Center: Align all factory interlocking edges in the middle of the grid. These provide the necessary water-tight seal to prevent urine from reaching the subfloor.
- The Compression Fit: When measuring for the wall cuts, add a 10mm oversize allowance. This forces the rubber to compress against the frame or kickboards, locking the entire grid in place.
- Eliminate Gaps: A loose perimeter allows bedding to work its way underneath the mats, creating humps and uneven footing. A tight, slightly oversized cut prevents this debris accumulation and potential hoof entrapment.
Caulking the Edges vs Allowing for Drainage
Sealing stall mat edges creates dangerous ammonia pockets and degrades sub-bases. The correct engineering solution relies on interlocking seams and proper drainage slopes to keep stabling dry.
The Risk of Trapped Moisture and Ammonia
Facility managers often attempt to caulk mat edges to create a “watertight” bowl, but this approach inevitably fails in an equine environment. Rubber mats expand and contract with temperature changes, and horses constantly shift weight on the surface. These forces break the seal or create micro-fissures, allowing urine to seep underneath the mat.
Once moisture breaches that seal, the caulk prevents it from escaping. This trapped liquid saturates the sub-base, ruining the compaction of fines or stone dust. More critically, it creates an anaerobic “ammonia pocket.” Bacteria thrive in this trapped moisture, releasing concentrated ammonia gas that degrades equine respiratory health. Additionally, most commercial adhesives dissolve quickly when exposed to urea and harsh stable cleaning agents, resulting in a peeling mess that traps more dirt than it excludes.
Utilizing Interlocking Seams for Natural Flow
The superior engineering approach works with gravity rather than against it. We recommend interlocking mats that mechanically secure the floor while allowing liquids to permeate through the seams. This system functions as a permeable membrane rather than a sealed barrier.
- Mechanical Security: Interlocking edges prevent mats from shifting under heavy hooves without requiring chemical adhesives.
- Drainage Pitch: This method works effectively with a standard 1-inch per 5-feet slope, directing waste away from bedding and into drainage channels.
- Ventilation Alignment: A drier floor supports DB Stable’s “Stack Effect Ventilation” design, significantly reducing humidity levels at the hoof line.
Preguntas frecuentes
What is the best tool for cutting thick rubber stall mats?
Forget power saws; the high friction melts the rubber, creates toxic smoke, and gums up the blade. A sharp utility knife is the professional standard. Place a 2×4 board under the cut line to force the material open, then score the rubber 4-6 times with a fresh blade until it separates cleanly.
Do I need to leave a gap between the mats and the stable wall?
Absolutely. Rubber is thermally active—it expands significantly in heat. You must leave a 1/4 to 1/2 inch (10-15mm) perimeter gap. If you fit mats flush against the wall, they will inevitably buckle and warp when the temperature rises. If the gap bothers you aesthetically, cover it with a wall-mounted trim, but never seal it tight.
Can I install stall mats directly over a dirt floor?
No. Natural dirt shifts under weight, creating dangerous soft spots and uneven surfaces. You need a stabilized base. Concrete or asphalt is ideal, but if you require a permeable base, use 4 to 5 inches of compacted stone dust (fines) or road base. Test the surface before laying mats: if your boot leaves a footprint, it is not compacted enough.
How do I prevent the mats from shifting over time?
Shifting almost always signals an uneven sub-floor or loose seams. Ensure your base is laser-level and fully compacted. Use interlocking kits where possible to lock the mats together; this stops bedding from working its way into the seams and lifting the edges. If you must use cut edges, bury them at the back of the stable away from high-traffic zones.
Reflexiones finales
Precision in installation defines your standing as a premium supplier. Ignoring the critical interaction between mat thickness and our 50mm “Cast-Proof” gap invites injury liabilities and premature corrosion claims. Adhering to these specifications ensures your clients receive a safer, long-lasting facility that safeguards your brand integrity.
Stop estimating clearances and start building with engineered precision. Request our technical specification sheets or a sample section to verify the Hot-Dip Galvanized After Fabrication quality against your current inventory. Contact our engineering team today to secure production slots for your next container load.


0 comentarios